
Better Than Costco Tuxedo Cake Recipe
This recipe is the exact same four layers as the Costco Tuxedo Cake, but homemade! You can make this cake with wholesome ingredients excluding unnecessary preservatives and additives that spoil desserts! When you shop, purchase real buttermilk and cream, pure vanilla extract and well sourced cocoa powder. The difference that quality ingredients make is well worth it.

Although it may seem overwhelming with the four layers and many steps to assemble the cake, I tried to keep them short and basic so that you can easily move from step to step. Once you have made this cake once and are familiar with the steps, you will see that it is not a tricky cake after all. I think this is a cake recipe for the books.
The name of the cake is called “tuxedo” because of the black and white layers, like that of a traditional tuxedo or suit.
The Costco four layer cake skips out on the vanilla cake, which makes it easier when baking at home since you only need to mix and bake one type of cake layer. The cake is kept moist with the flavour filled two chocolate mouse layers: regular chocolate and white mouse.
Tools You May Need
5 Mixing bowls (x2 Small, x2 Medium, Large)
Double Boiler (I use a small pot and my regular glass mixing bowsl)
Kitchen Scale or Measuring Cups
Measuring spoons
Hand mixer or Stand Mixer
2 Cake Pans (8 inch worked well for me)
1 Bread Loaf Pan (9 x 5 inch worked well for me)
Spatula
Small Pot
Cake Mold (I used an oven dish the same size as my cake pans)
Cling Wrap (also called Glad wrap)
Step-By-Step Costco Tuxedo Cake Recipe
Chocolate Cake
Preheat the oven to 350°F and grease x 2 cake pans (8 inch pans work well). In a MEDIUM bowl, mix dry ingredients together.
In a LARGE bowl, cream together butter and sugar. Whisk in the eggs and vanilla extract, and then whisk in the oil and sour cream until combined.
Fold in HALF of the dry ingredients, then fold in the buttermilk and coffee. Then fold in the OTHER HALF of the dry ingredients.

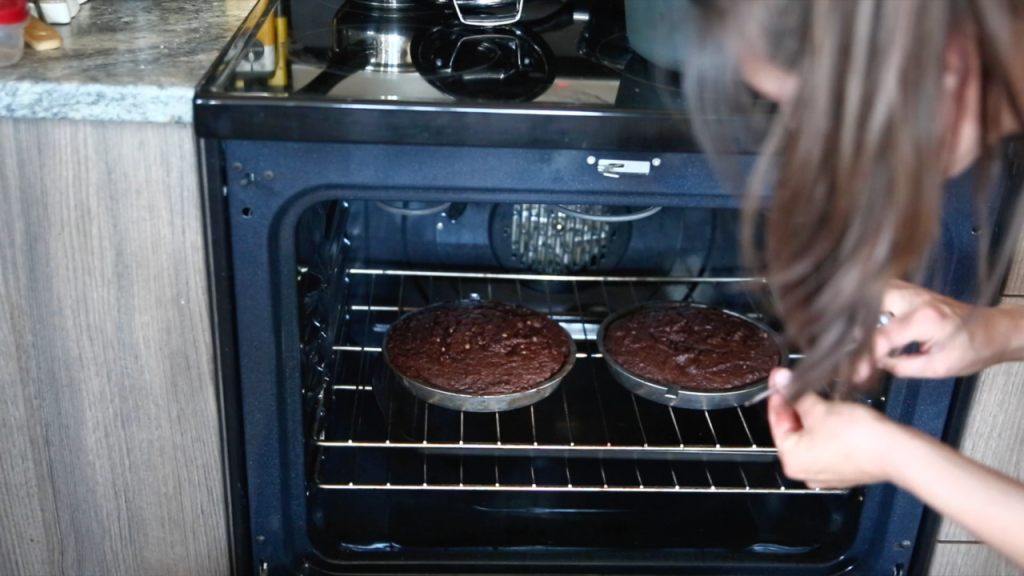
Pour batter into cake pans and bake for 35 minutes (or until a fork comes out clean without any batter attached).
Remove the cake pans from the oven and let them rest for a few minutes. Extract cakes from pans and let them cool.
Brownie
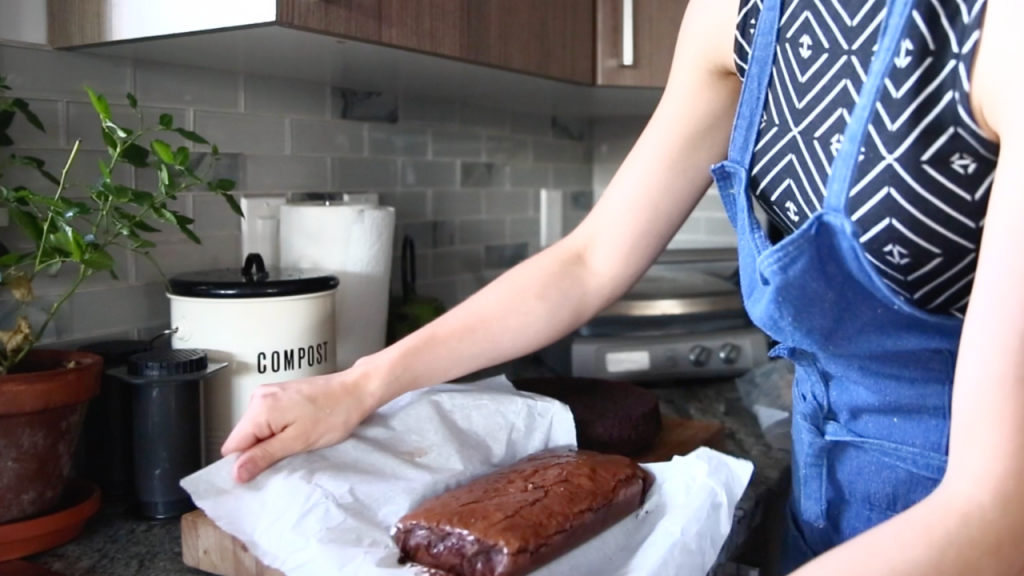
Layer parchment paper into bread pan.
In a MEDIUM bowl, mix dry ingredients together. In SMALL bowl, melt the chocolate and butter together on a double boiler on your stovetop.

In a LARGE bowl, whisk together the eggs, sugars and vanilla until it’s fluffy. Once the chocolate is melted, whisk into egg mixture (LARGE BOWL) until it is thick. Then fold in there dry ingredients.
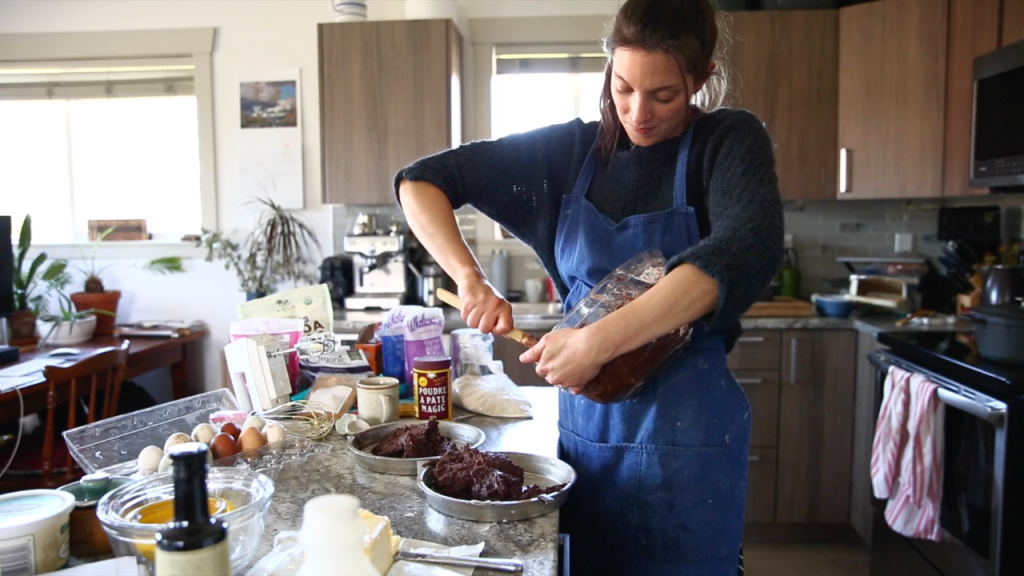
Pour the batter into the loaf pan and bake for 50 minutes (or until a fork comes out clean without any batter attached). Once cool, dice into 2-3 inch squares.

Chocolate Mousse
In the SMALL bowl, melt the chocolate and butter on a double boiler on your stovetop
Separate egg whites from egg yolks.
Ready 3 mixing bowls for the next steps (preparing your egg whites, cream, and egg yolks mix)
In BOWL 1 (medium), whip the EGG WHITES, cream of tartar and salt until it reaches stiff peaks. Mix in HALF of the sugar as you whip the egg whites.
For BOWL 2 (small), whip the CREAM until it reaches stiff peaks.
Then in BOWL 3 (medium), whisk the EGG YOLKS + OTHER HALF OF SUGAR and vanilla extract over a double boiler on your stovetop
Still on the stovetop with the heat turned down to low, fold in the egg whites mixture (into the egg yolk mixture on the stove). Then fold in the cream until just combined.
Construction of Cake
Layer a oven dish with cling wrap (or Glad wrap) carefully to ensure the entire base and sides are covered well. If you have a cake mold, you don’t need to do this step.
Start with a cake layer at the bottom, then sprinkle the brownie pieces on top.
Pour over the chocolate mouse and place cake in fridge to cool for 1 hour.

White Chocolate Mousse
Ready 3 bowls for the next steps (preparing the heavy cream, cream cheese and chocolate).
In your BOWL 1 (small), mix the HEAVY CREAM until it has stiff peaks. My handheld mixer is at full speed for this step.
For the BOWL 2 (medium), whip the CREAM CHEESE until its fluffy.
Then in BOWL 3 (small), melt the chocolate and butter on a double boiler on your stovetop.
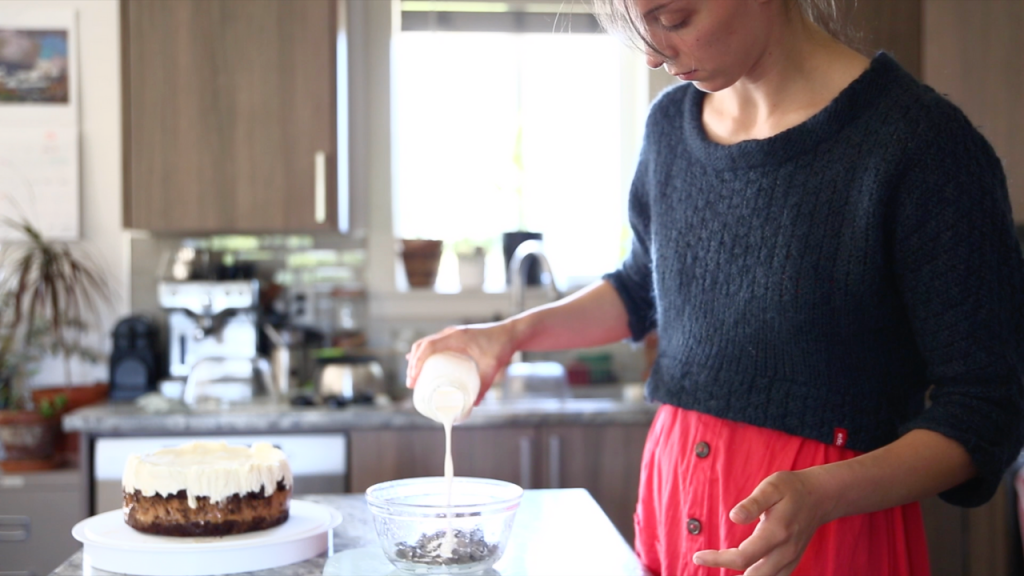
Whisk the chocolate into the cream cheese until combined. Add the vanilla extract and then fold in the heavy cream until combined.
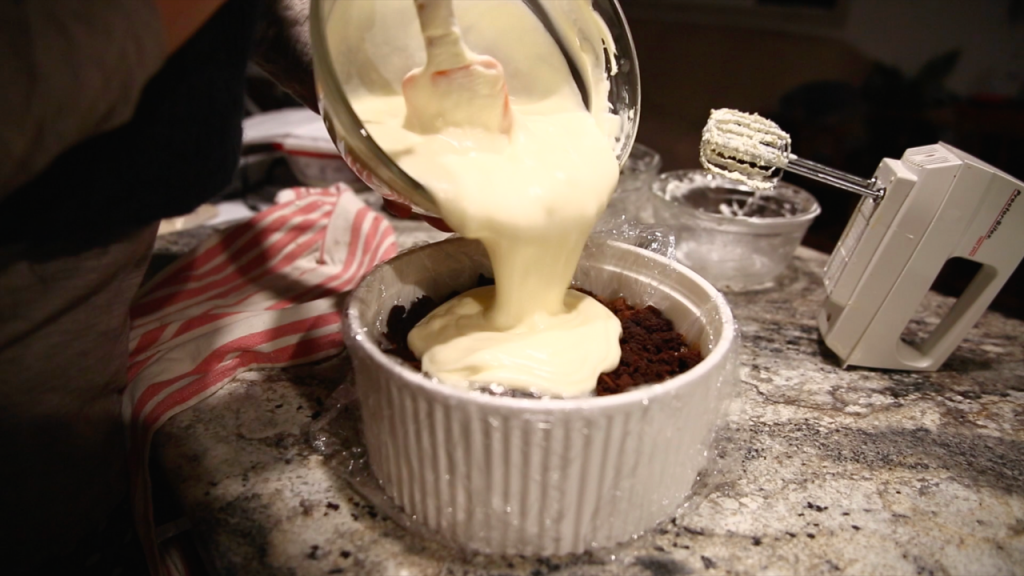
Pour the white chocolate mousse over the chocolate mousse layer and then layer the second cake on top. Return to fridge and cool overnight (or at least 8 hours).
Chocolate Ganache
You have come thus far!!
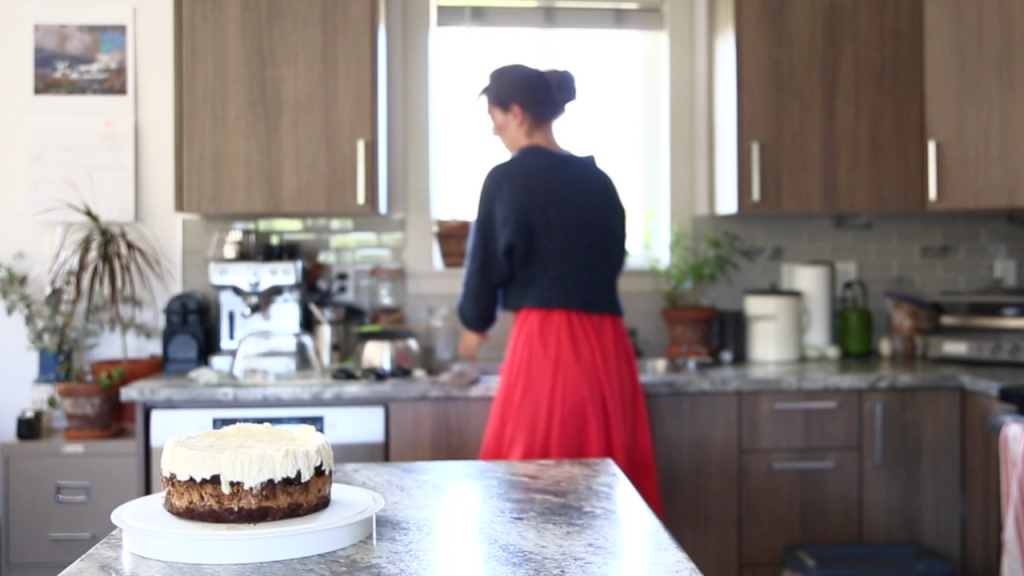
Remove the cake from the mold by pulling upward on the cling wrap carefully and place cake on a cake plate.
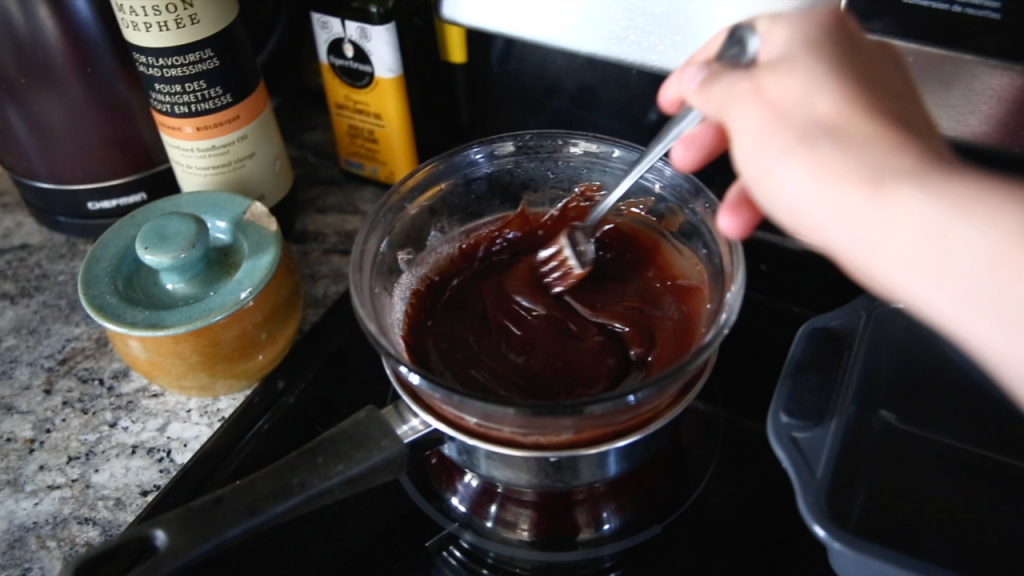
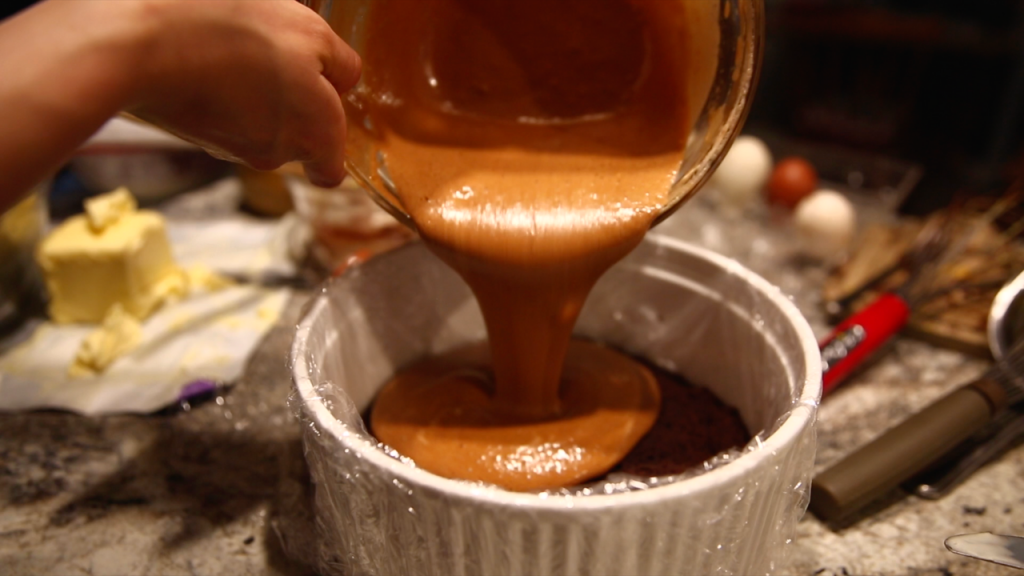
In a small bowl, melt the chocolate and heavy cream on a double boiler on your stovetop to make th ganache.

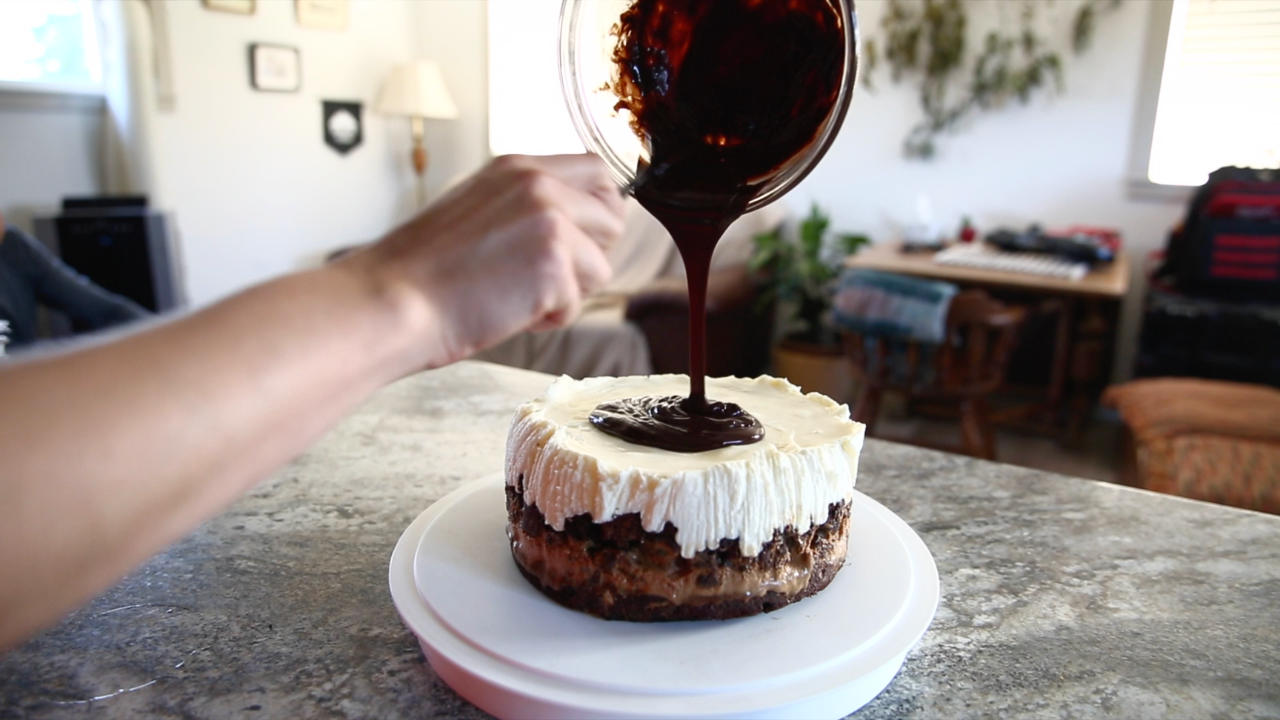
Next, pour the ganache onto the cake beginning in the centre (it will flow slightly outward). You can use a cake spatula to smooth out the ganache layer.
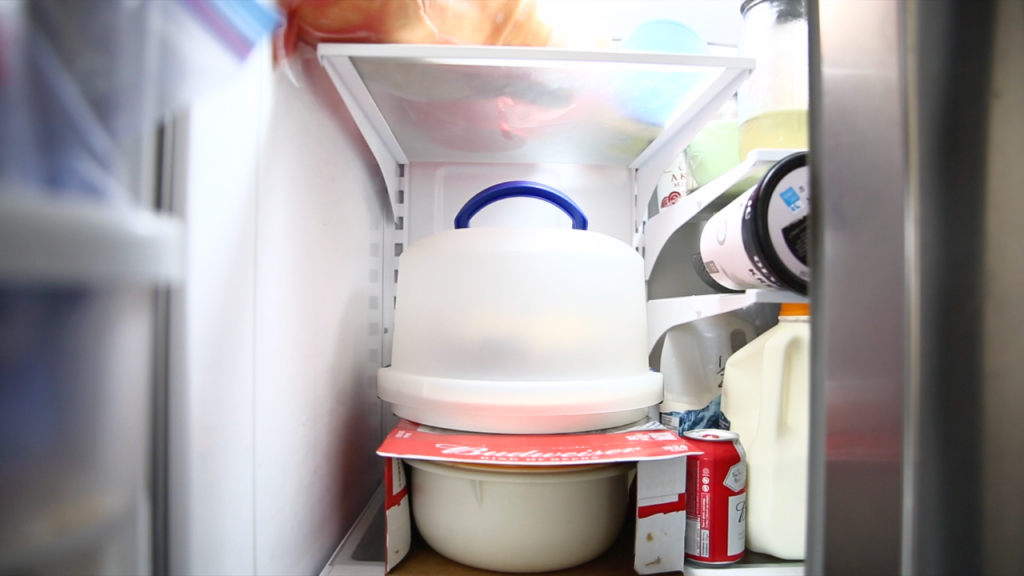
I have stored the cake in fridge for up 2 weeks!

My Favourite Kitchen Appliances


This post contains affiliate links, which means I make a small commission at no extra cost to you. See my full disclosure here.
Tuxedo Cake Recipe
Finally, the long awaited Tuxedo Cake Recipe. If you make this recipe, please come back and give this recipe a rating!

Costco Tuxedo Cake Recipe (Step-By-Step)
Equipment
- Hand or Stand Mixer
- Several Mixing bowls x2 Small, 2x Medium, x1 Large
- Mixing Cups and Spoons or a Volume Scale
- 2 Cake Pans 8 inched worked well
- 1 Bread Loaf Pan 9 x 5 inches worked well
- Whisk
- Spatula
- Small Pot or double boiler set up
- Cake Mold or a oven dish the size of you cake pans
- Cling Wrap also called Glad Wrap
Ingredients
Chocolate Cake
- 2/3 cup Flour 160ml
- 1/3 cup Cocoa Powder (Dutch Pressed) 80ml
- 1 tsp Baking Powder 5ml
- 1/4 tsp heaped Baking Soda 2.75ml
- 1/3 tsp Salt 2.75ml (1/4 tsp heaped)
- 1/3 tsp Ground Cinnamon 2.75ml (1/4 tsp heaped)
- 1/3 tsp Ground Espresso 2.75ml (1/4 tsp heaped)
- 3 tbps Unsalted Butter 45ml
- 3/4 cups Granulated Sugar 180ml
- 2 Eggs
- 1/2 tsp Vanilla Extract 2.5ml
- 1 tbsp Sunflower Oil 15ml
- 1 tbsp Sour Cream 15ml
- 1/3 cup Buttermilk 80ml
- 3 tbsp Strong Coffee 45ml
Brownie
- 1/3 cup Flour 80ml
- 3 tps Cocoa Powder (Dutch Pressed) 45ml
- 1/2 tsp Salt 2.5ml
- 1 tsp Ground Cinnamon 5ml
- 4 tsp Ground Espresso 5ml
- 1/4 oz Semi-Sweet Chocolate 120ml
- 1/2 cup Unsalted Butter 60ml
- 1/4 cup Granulated Sugar 118ml
- 1/2 cup Brown Sugar 60ml
- 2 Eggs
- 1 tsp Vanilla Extract 5ml
Chocolate Mouse
- 2 oz Semi-Sweet Chocolate 60ml
- 2 tbsp Unsalted Butter 30ml
- 2 Eggs
- 1/4 tsp Salt 1.25ml
- 1/8 tsp Cream of Tartar
- 1/4 cup Granulated Sugar 60ml
- 1/2 tsp Vanilla Extract 2.5ml
- 1/4 cup Heavy Cream 60ml
White Chocolate Mouse
- 4 oz Cream Cheese 120ml
- 3 oz White Chocolate 90ml
- 1/4 cup Unsalted Butter 60ml
- 1/4 tsp Salt 1ml
- 1/2 cup Heavy Cream 118ml
- 1/2 tsp Vanilla Extract 2.5ml
Chocolate Ganache
- 3 oz Semi-Sweet Chocolate 90ml
- 3 tbsp Heavy Cream 45ml
Instructions
Chocolate Cake
- Preheat the oven to 350°F
- Grease x 2 cake pans (8 inch pans work well)
- In a MEDIUM bowl, mix dry ingredients together
- In a LARGE bowl, cream together butter and sugar
- Whisk in the eggs and vanilla extract
- Whisk in the oil and sour cream until combined
- Fold in half of the dry ingredients
- Fold in the buttermilk and coffee
- Fold in the other half of the dry ingredients
- Pour batter into cake pans and bake for 35 minutes (or until a fork comes out clean without any batter attached)
- Remove the cake pans from the oven and let them rest for a few minutes
- Extract cakes from pans and let them cool
Brownie
- Layer parchment paper into bread pan
- In a MEDIUM bowl, mix dry ingredients together
- In SMALL bowl, melt the chocolate and butter together on a double boiler on your stovetop
- In a LARGE bowl, whisk together the eggs, sugars and vanilla until it is fluffy
- Once the chocolate is melted, whisk into egg mixture (LARGE BOWL) until it is thick
- Fold in there dry ingredients
- Pour the batter into the loaf pan and bake for 50 minutes (or until a fork comes out clean without any batter attached)
- Once cool, dice into 2-3 inch squares
Chocolate Mousse
- In a SMALL bowl, melt the chocolate and butter in a double boiler on your stovetop. Once melted, set aside.
- Separate egg whites from egg yolks
- Ready 3 mixing bowls for the next steps (for preparing your egg whites, cream, and egg yolks mix)
- In BOWL 1 (small), whip the CREAM until it reaches stiff peaks
- In BOWL 2 (medium), whip the EGG WHITES, cream of tartar and salt until it reaches stiff peaks. Mix in HALF OF THE SUGAR as you whip the egg whites.
- In BOWL 3 (medium), whisk the EGG YOLKS + OTHER HALF OF SUGAR and vanilla extract over a double boiler on your stovetop
- Add melted chocolate in with egg yolks mix (BOWL 3)
- Still on the stovetop with the heat turned down to low, fold in the egg whites mixture (into the egg yolk mixture on the stove)
- Take mixture off the stove
- Then fold in the cream until just combined
Construction of Cake
- Layer a oven dish with cling wrap (or Glad wrap) carefully to ensure the entire base and sides are covered well. If you have a cake mold, you don't need to do this step.
- Start with a cake layer at the bottom
- Sprinkle the brownie pieces on top
- Pour over the chocolate mouse
- Place cake in fridge to cool for 1 hour
White Chocolate Mousse
- Ready 3 bowls for the next steps (preparing the heavy cream, cream cheese and chocolate)
- In BOWL 1 (small), mix the HEAVY CREAM until it has stiff peaks. My handheld mixer is at full speed for this step.
- In BOWL 2 (medium), whip the CREAM CHEESE until its fluffy
- In BOWL 3 (small), melt the chocolate and butter on a double boiler on your stovetop
- Whisk the chocolate into the cream cheese until combined
- Add the vanilla extract
- Fold in the heavy cream until combined
- Pour the white chocolate mousse over the chocolate mousse layer
- Layer the second cake on top
- Return to fridge and cool overnight (or at least 8 hours)
Chocolate Ganache
- Remove the cake from the mold by pulling upward on the cling wrap carefully
- Place cake on a cake plate
- In a small bowl, melt the chocolate and heavy cream on a double boiler on your stovetop to make th ganache
- Pour the ganache onto the cake beginning in the centre (it will flow slightly outward)
- Use a cake spatula to smooth out the ganache layer
- Store in fridge for up 2 weeks
Video
Notes
Whip: Use a mixer (handheld or counter mix)
Fold: Use a spatular and with circular motions fold inward to mix Tips:
- Buy wholesome ingredients. It is true that “real food” tastes much better with true ingredients. None of the “cheaply processed” and aftermarket created stuff, just real plain and preserved food. This cake tastes much better with high quality vanilla, cocoa and real heavy cream.
- Sift your dry ingredients if you are using items from your pantry that are older than a year
- Use a volume scale. I’ve included the volume measurements, ml (millilitre) is the same as g (grams)
Tips for Making Tuxedo Cake
- Where you can, use a volume scale: this will make measuring the ingredients much quicker and save you form having to wash your measuring cups and spoons every time!
- Buy wholesome ingredients: this makes the difference between a good tasting cake and a great tasting cake! And you want to benefit from the true taste of this tuxedo cake recipe, so choose to use the “real” stuff.
- Sift old dry ingredients: I’ve used an older batch of cocoa before that had some clumps in it, and these did not mix well into the cake batter. I recommend that you sift ingredients like this if they’ve been on your shelf for some time.
Pin the Tuxedo Chocolate Mousse Cake

Happy baking and celebrating!!


Thank you for your feedback, Jake! I’m glad your cake turned out and tasted delicious!
This cake turned out amazing! The entire cake was devoured right after dinner! We loved the taste of the mousses, it really is better than the Costco version!
4 stars because the recipe was hard to understand on a few steps.. I would recommend reading instructions and watching the video a couple times to get a good understanding of how to make the mousses. Also watch a separate video on the correct way to get stiff peaks while whipping the egg whites. If you whip incorrectly you will not get the right consistency on the chocolate mousse.
Thanks for all the hard work you put into this recipe and video! I attempted a couple other versions of tuxedo cake and this recipe by far has the best taste and consistency of the mousses and cake!
Hi Lindsey! Thank you. I did make the corrections during 2022 and 2023 as they came up, and I’m very curious to know how did your cake turn out!?
Hi there… I’m halfway through the process, and have already found so many typos and conflicting messages. I appreciate the time you put out into this.. but I think it’s a disservice not only to your followers, but to yourself, to not proof read EVERYTHING before posting something. People spend a lot of money on ingredients and spend a lot of time investing in making these potentially beautiful creations. I highly recommend you take the time to slow down and go through every single word.. every single measurement BEFORE posting. I noticed many people had to correct it for you.. and that is very unfortunate.
I hope this is received well. 🙂 I’m giving it a go! We will see how it goes….
Thank you for the comment!! It’s a typo, meant to be 1/2 cup, sorry for the trouble!
Hi there, just finished with the brownie portion and I think it’s wrong. Two cups of brown sugar? They won’t even come out of the pan….
Hi, thank you for your comment! In the video when I mix the chocolate mouse, it may look like my stove is off when I probably had just turned it off and it would still warm. This is good because you aren’t trying to cook anything on the stove in this case, just catch the chocolate while it’s still warm and melted. Now you mention you “mixed the egg white to the egg yolk”, I don’t believe that will result in a successful mousse.
Someone else also mentioned the cream being missing from the white chocolate mouse ingredient list, I just added it back. I really appreciate the feedback so we can ensure future bakers have all they need to make this cake!! Kind regards.
Thank you for your comment, somehow that ingredient got off the list. I’ve updated the recipe card, you should add 1/2 cup of heavy cream and follow the directions as noted for the heavy cream. Happy baking!! 🙂
The directions for mixing the white chocolate mouse say to mix the cream (heavy cream) until it has stiff peaks, yet the ingredients you have listed for the white chocolate mouse doesn’t include heavy cream. So my question is, how much heavy cream is needed for the white chocolate mouse?
Hi, thank you for sharing your recipe. I did tried it. It was good but the mousse didn’t set up much especially the chocolate mousse. Having said that, I am more concerned with the egg white. In your recipe instruction, you put to fold it while on low heat but in your video, you fold everything (melted chocolate, egg white and cream) with the stove off. The egg white will likely not be cooked anyways on low fire. So what idid, I mixed the egg white to the egg yolk until it reached to 160 degrees. Then I folded the chocolate and cream.
Another thing I noticed, the white chocolate mouse ingredient list doesn’t include cream so I put the same amount as the cream cheese.
Hi Sheri, thank you for your comment! So the white mouse lists both cream cheese and cream. I added a note to the directions that make it a bit more clear where the ‘heavy’ cream should be, not to be confused with the cream cheese. You are correct about the ganache, the ingredient list is correct and the directions should ready “heavy cream” and not butter. I’m curious, how did your cake turn out? Thanks again for pointing out the change needed in the ganache directions.
I appreciate all of the work you put into this!!! I’m making this as a bday cake because the Costco cake is their favorite. I am hopefully improvising correctly. The white mouse lists cream cheese, white chocolate, butter, salt and vanilla but the directions say to mix the heavy (cream?) so I did 1/4 cup just like the chocolate mouse. Then the ganache says chocolate and 3 TBSP cream. The instructions say to heat the chocolate and butter :/ (3TBSP butter instead of cream? In addition to?) I’m sure this will taste great no matter what, but accurate ingredients/instructions are kind of mandatory if you want readers to be able to make this. Again, I appreciate the work put into this!! Just hope I’m doing it right.
Hi Sherrie,
You’re right, I missed noting that! You would add the second cake layer to the top of the cake before putting it in the fridge to harden overnight. Thanks for pointing it out!!
So you state to bake cake in 2 cake pans (8 inch pans), but you only mention using 1 cake layer in cake construction. (Start with a cake layer at the bottom. Sprinkle the brownie pieces on top.)
Where does the 2nd layer go? Is the 2nd cake layer not used?
Good question! You don’t really taste the coffee in the cake, so I don’t see why not. From what I learned, the coffee makes the chocolate flavour taste better. I’ve baked most of our chocolate cakes with strong coffee and never thought to substitute it for just plain water. Let me know how it turns out if you try it.
Can go substitute e coffee just with water )
Hi! It should be two eggs for the cake layer. I corrected the recipe, thanks for letting me know.
Hi, In the video and master list of ingredients you use 2 eggs in the cake, but on the recipe it says one, is it two eggs or one egg in the chocolate cake layer?